Effortlessly Manage Your Digital Displays
Uploading your content into the Cura system
You may upload images and videos to be used on Cura displays in a number of ways:
- Using Cura’s native cloud storage
- Using PC Browsers, Phone browsers, Mobile Cura Display app (unregistered Devices)
- Registered Mobile devices with Cura Display app. Upload and Sync features
- Indirectly via Google Photos Cura/sync processes
This guide is focused on Cura’s native cloud storage with some basic and more advanced best practices for uploading ad hoc items or larger numbers of media items for later use in sorted or filtered collections on rooms or displays.
Note: Check out Cura’s privacy and content policies here: Your content remains your content and is private to you.
Need to learn how to remove/delete your content from Cura, scroll down or click here.
Simple Steps and options to upload Your Content
-
- Via the Cura App Uploaders
- Upload/Sync using you registered phone or tablet. (iPhone, iPads, Android (Samsung etc. ),Tablets) click here
Cura App Uploaders:
Step 1
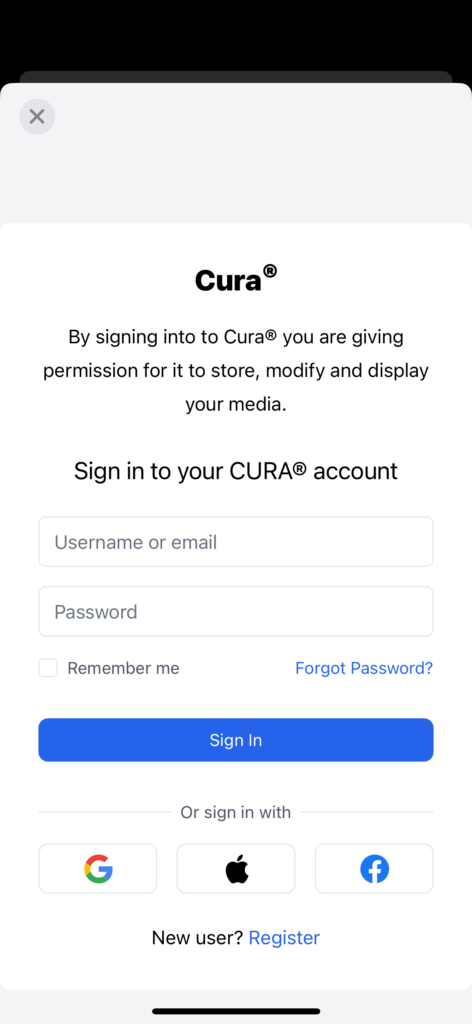
Log in to your Cura account and navigate to an upload section.
You may begin the upload process in a number or areas from any mobile device or PC once logged into your account:
- In the Media Library: Upload ↑ in the top menu bar (left).
- In a non-Google Photos linked Collection: Upload ↑ in the top menu bar (right).
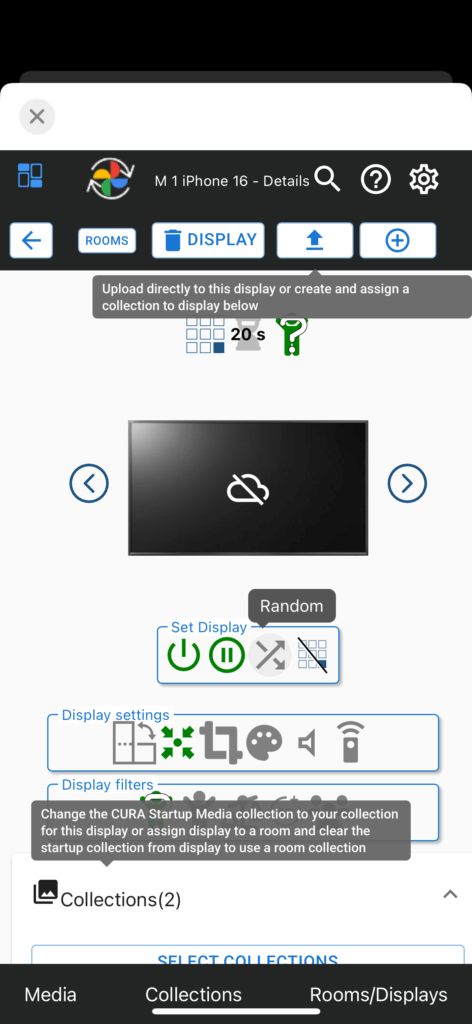
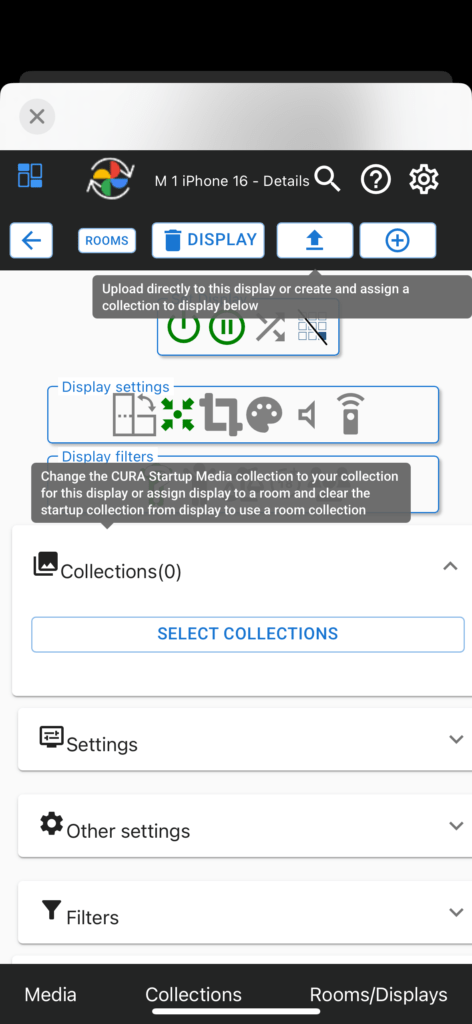
- In a display details page: Upload ↑ to Display in the top menu bar.
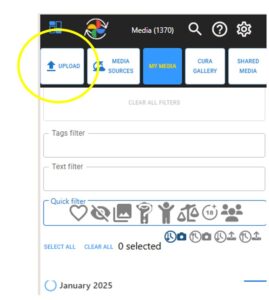
Upload from Media Library

Upload from Collection
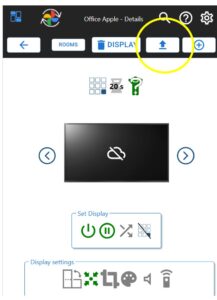
Upload from Display
Step 2
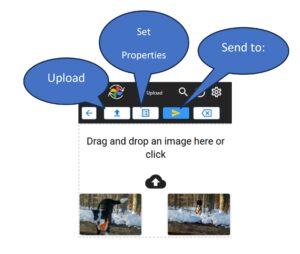
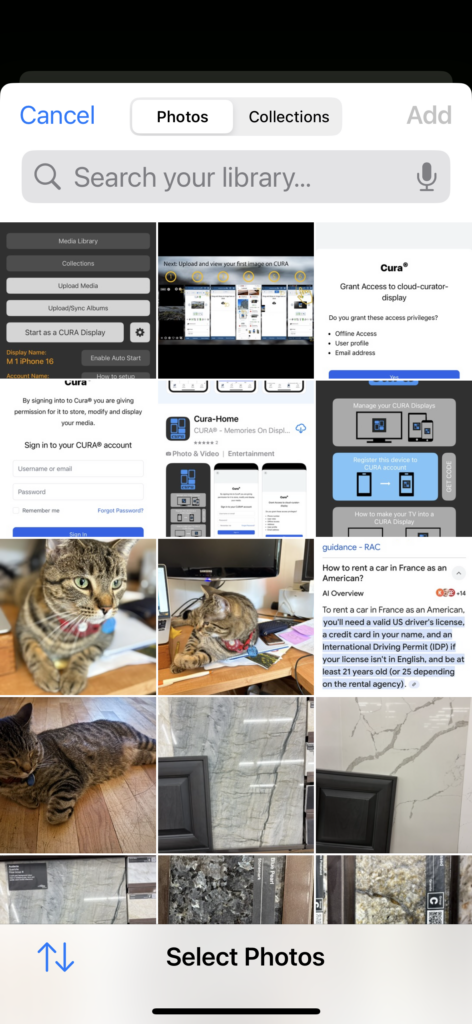
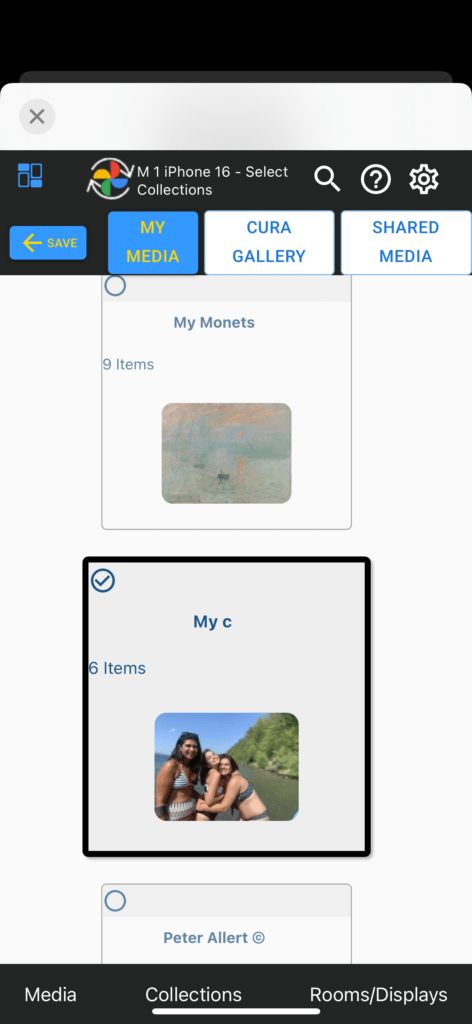
In all cases you may upload single or multiple media items by selecting or drag and dropping multiple items, in the upload file selection dialog.

Step 3 - Options
In all cases you have the option to “Set Media Properties” to the media items being uploaded (explained in detail below) and/or to Send Media directly to Displays or Collections with the Upload ↑ Files or you can just Upload ↑ Files directly.

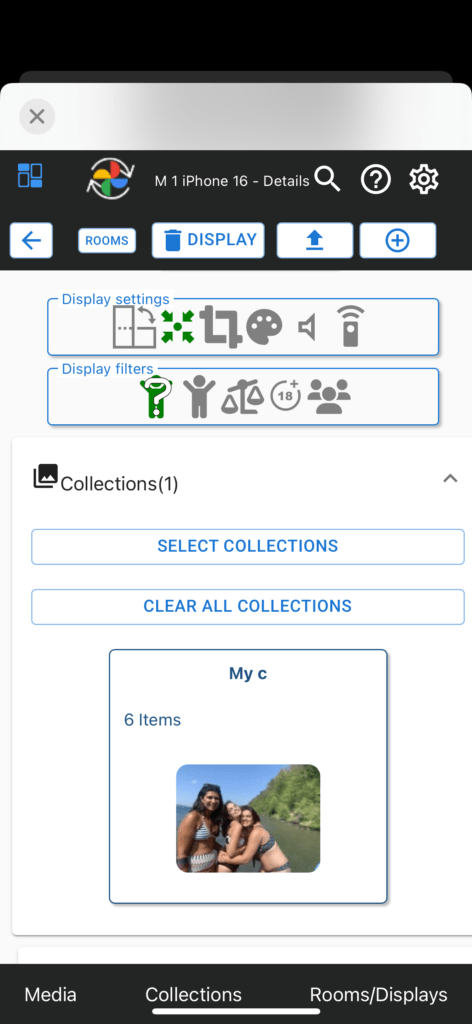
Additionally, if you upload from a collection (2) you have the additional option to simultaneously upload to the collection and select displays that you may wish to immediately display the uploaded items:
> Send to Display.
If you use the display (3), you only send the media item to the display and the library.
If you upload from the Media library (1), you are also able to send the media items to displays or collections (New or existing) or both at the same time. In each case make sure you confirm the name of the collection/display before you “Upload files”.
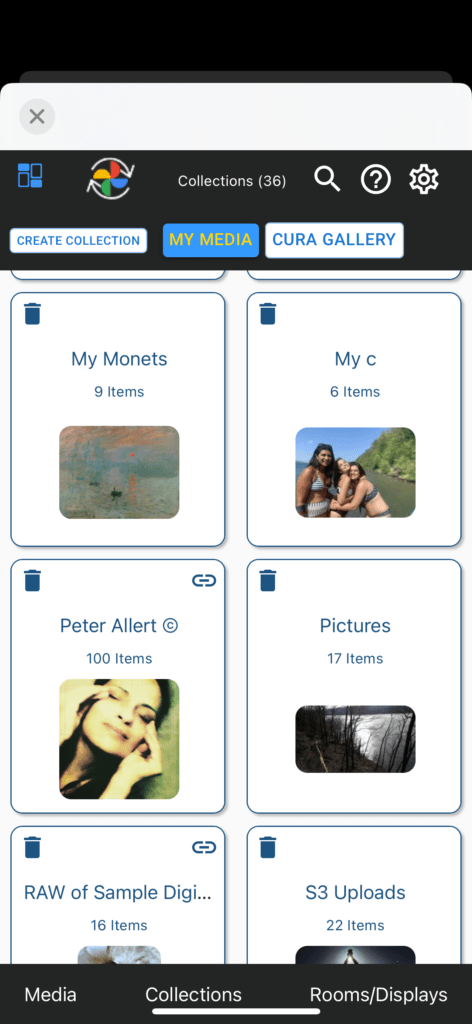
In all cases the media items will be listed in the main media library under “My Media” and in the collections you have directed the items to appear in.
Step 4
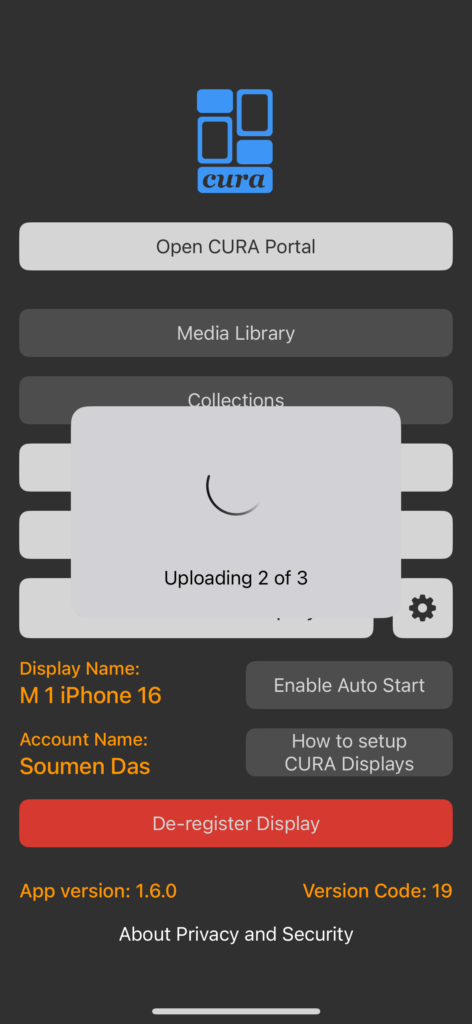
Click ‘Upload’ and watch as your content is seamlessly integrated into the Cura system.
Registered Phone Upload or Album Sync
Step 1
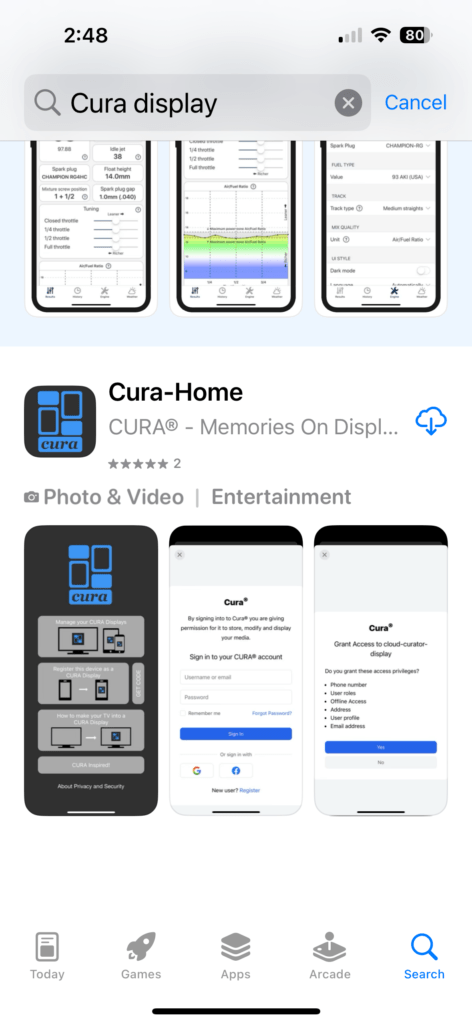
On your iPhone or iPad go to the App Store, search for Cura Display (Home), on Android (Samsung and all others) go to the Play store and search for Cura Display and install the Cura app.
Step 2
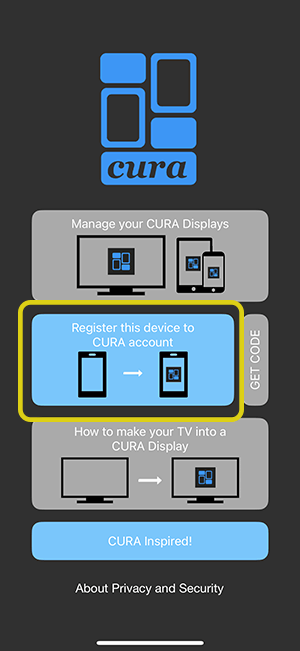
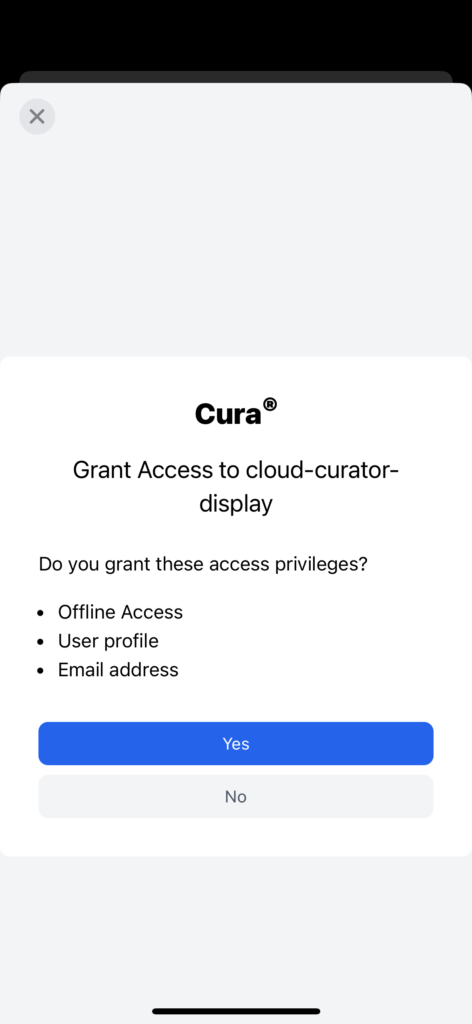
Register your phone to your Cura account
Step 3
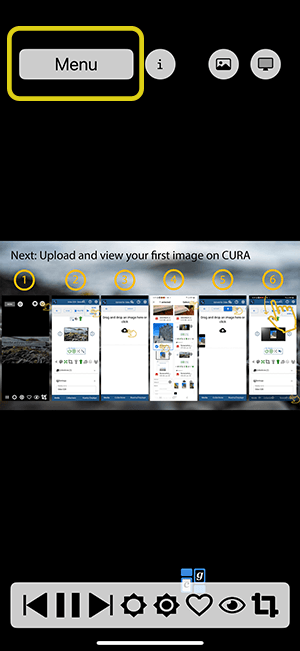
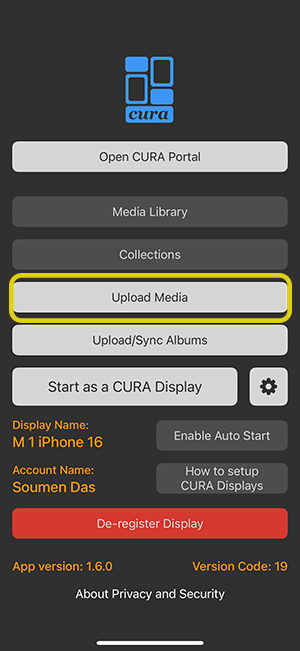
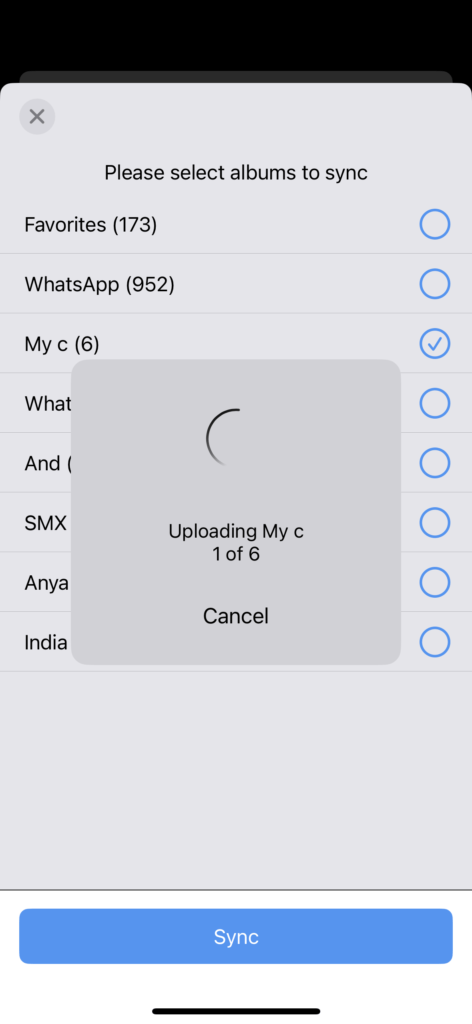
Use the App -Upload or Upload/Sync Albums options to select individual/multiple or albums (from Photos or Gallery) you wish to upload.
Note:
-
- Uploads via the individual /multiple selection option will be uploaded into your Cura Media library
- Uploads using the Sync albums option will create a collection in Cura, upload your media into your library and add those items into the collection. If you add or remove items from the albums on your phone at a later date. new items will be uploaded and synced, Items removed will be removed from the Cura collection
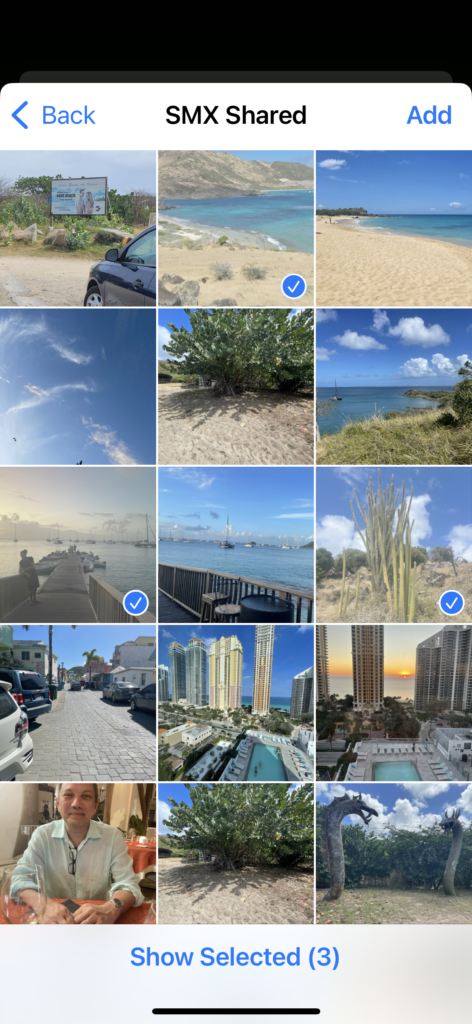
- iPhone and iPad users can choose items and shared albums that are in their iCloud photos storage for upload and syncing into Cura. This ability is very useful as partner /family members can add to a iCloud shared albums that will synced to your Cura collection, that can be then assigned to your Cura displays.
- As your phone is registered to your account you will not need to re-login to the account to keep syncing items.
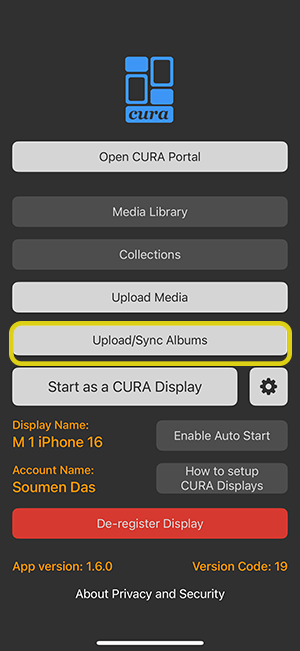
Here are some screen shots showing what is described above
- Finding the registering your phone
- Uploading from the upload menu
- Uploading/Syncing Albums
- Assiging a synced album/collection to a Display
How to Delete your media from Cura
Deleting your uploaded media from CURA is easy. Go to the Media tab select the items(s) you wish to delete, Click the “remove media” ![]() icon to the top of the page. Tip: If you want to Delete (vs Remove) all images from a collection, go to the collection, Click on “Select All”, then go to “Media” and click on the Delete/Remove Icon.
icon to the top of the page. Tip: If you want to Delete (vs Remove) all images from a collection, go to the collection, Click on “Select All”, then go to “Media” and click on the Delete/Remove Icon.
Best Practices for Optimal Uploads
Collection Naming
When naming collections use names that are clear and useful that enable you to easily understand the content of the collection. This is not only useful in your media library, but can then be used in voice commands. E.g. naming a collection clearly as “2024 Beach vacation” can be used in a voice command: “Show me my 2024 Beach vacation collection in the living room” (See how to set voice commands up on you phones here).
Meta data and Media Properties
When you upload media into the Cura system, the upload process reviews and processes as much data that is contained in the meta data of files. In most cases this is just the “date taken”, but elements such as title, subject, taken by, description/comments and captions/labels/tags, will be read in and stored in the Cura data associated with the uploaded media. This data can then be later used to e.g. reverse order a collection by date taken to tell a timeline story or find and create additional sub or superset collections. Some of this information such as date taken, taken by, title and subject can also be used as captions that are displayed on the image when they are being displayed.

Using Set Media Properties
As mentioned above, in most cases raw media on your phone will contain limited meta data, if you use photo management software such as Adobe Light Room or others, the meta data (such as Titles, labels, creator etc.) if saved will carry across into Cura. The Set Media Properties steps can be performed as part of the upload process or at any time later after upload, it allows to you to set or append certain metadata elements that could be useful later in additional collection creations, filtering etc.
Additionally, Cura has enhanced tagging for both content safety levels and target audiences that can be used later as display filters..
An example:
If you were to upload several of your favorite photos in batches of 200 or so, from your vacations, birthdays or Xmas holidays over the years into collections named say “Beach Vacation 2024”, “Spanish Vacation 2023”, “Xmas 2023”, ”Xmas 2024”, “Margaret’s Birthday 2024 “ etc. In each case is you tagged the images with “Vacation”, “Beach” , “Xmas” and “Margaret” you can use these tags to select and create a superset collection of say “Xmas through the years” that you can play on your displays during the Xmas seasons.
In the example above, there may be a number of images that are age inappropriate, more private or not so interesting to others, that you can set enhanced tagging on safety level and target audience. You have choices of Safe, Moderate (need judgment) , or Adult, for age appropriateness, for audience , you can tag them for General, Friends , Family , Partner or Owner.
When you play back these collections you can select your Room/Display filters to only display your desired subsets depending on who is around.
General Tips and Tricks in creating and safeguarding your photo library.
Above we outlined some best practices on how to manage your images/media to enable you to enjoy them on your TV/displays using Cura. Here are a few more current general tips that you should consider to help you organize and safeguard (backup) your media.
- Using a family enabled cloud service such as Apple Photos, (with iCloud), Google Photos (with Google One), that will enable you to offload and backup your phone, your partners phone, and your other non-phone media, into shared folders and /or albums, that you can then use to upload into your secure CURA collections. These plans could cost you approximately $20 to $100 annually for 100GB to 2TB annually. Most folk would need about 200GB. In general, you can use their apps on your phone to get achieve most of the organization you may need, but they also have access to your media via PC’s and web browser that may be more suitable for photo organization.
- In addition to 1. Or as an alternative you store your files on your PC with an backup external USB hard drive (1TB for about $50 including the backup software) you can then organize your media with: (In each case there are mechanisms to import your phone media)
- Your normal file manager and file system editor (free)
- Adobe Bridge (free)
- ACDSee Photo Studio (organizer and Editor) $50 One Time purchase.
- Adobe Lightroom, Mobile. Web and PC and includes 1TB of cloud storage for about $150 a year.
- Mylio Photo organizer ($120 per year) Add $144 per year for 2TB cloud storage.
- Others
AI, facial and location recognition tools that can be found on your phone, Apple Photos, Google Photos and products such as ACDsee, Adobe Lightroom, Mylio and others that can help you organize and sort through your photo libraries.
Useful features such as auto updating albums on your phone or Apple/Google Photos can be linked to Cura to upload for display items that may be of a particular person or pet so they can be automatically displayed with Cura.
Ensure High-to -Mid Resolution Images
Use Supported Image Video Formats
Label/Tag Files Clearly for Easy Access
Maintain Consistent Aspect Ratios
Back Up Original Files
Utilize Cloud Storage Options
Keep Metadata Accurate and Updated
Stay Informed About New Features
Common Questions About Uploading to Cura
Discover answers to frequently asked questions about uploading your content to the Cura system.
How do I upload images to the Cura system?
To upload images, log into your Cura account, navigate to the ‘Upload’ section, and select the images you wish to upload. Ensure they are in a supported format such as JPEG or PNG.
What video formats are supported by Cura?
Cura supports a variety of video formats including MP4, AVI, and MOV. Make sure your video is in one of these formats for a smooth upload process.
Can I upload content from my mobile device?
Yes, you can upload content directly from your mobile device using the Cura app. Simply open the app, go to the ‘Upload’ sections (as above), and select your files.
Is there a file size limit for uploads?
Yes, the maximum file size for uploads is 200MB. If your file exceeds this limit, consider compressing it before uploading.
How do I manage my uploaded content?
Once uploaded, you can manage your content through the ‘My Media’ section in your Cura dashboard. Here, you can organize, edit, or delete your files as needed.
What should I do if my upload fails?
If your upload fails, check your internet connection and file format. If the problem persists, contact Cura support for assistance.
Can I schedule when my content is displayed?
Yes, Cura allows you to schedule your content display times through the ‘Schedule’ feature in your dashboard. Set the date and time for your content to go live.
How secure is my content on Cura?
Cura uses advanced encryption to ensure your content is secure. Only authorized users can access your uploaded files, You and only display them on your CURA screens. Its not possible to recopy your files
Can I share my uploaded content with others?
No, you cannot share your content, you can only securely display them on your screens
Watch Our Upload Tutorial
Explore our step-by-step video tutorial that guides you through the process of uploading images and videos to the Cura system. This comprehensive guide will help you get started quickly and efficiently.
What Our Users Say
“Using Cura has transformed how I manage my digital displays. Uploading content is a breeze, and the system is incredibly intuitive.”

Emily Johnson
Marketing Manager
“Cura’s upload feature is seamless and efficient. I can easily update my displays from anywhere, which is a huge time-saver.”

Michael Smith
Event Coordinator
“The ability to upload and manage content remotely has been a game-changer for our business. Cura makes it simple and secure.”

Sarah Lee
Business Owner
“Cura’s platform is user-friendly and reliable. Uploading content is straightforward, and the support team is always ready to help.”

David Brown
IT Specialist
Start Showcasing Your Content Today
Experience the ease of managing your digital displays with Curator Technologies. Begin uploading your images and videos to the Cura system and transform the way you present your content. Elevate your digital storytelling.